Road Builder
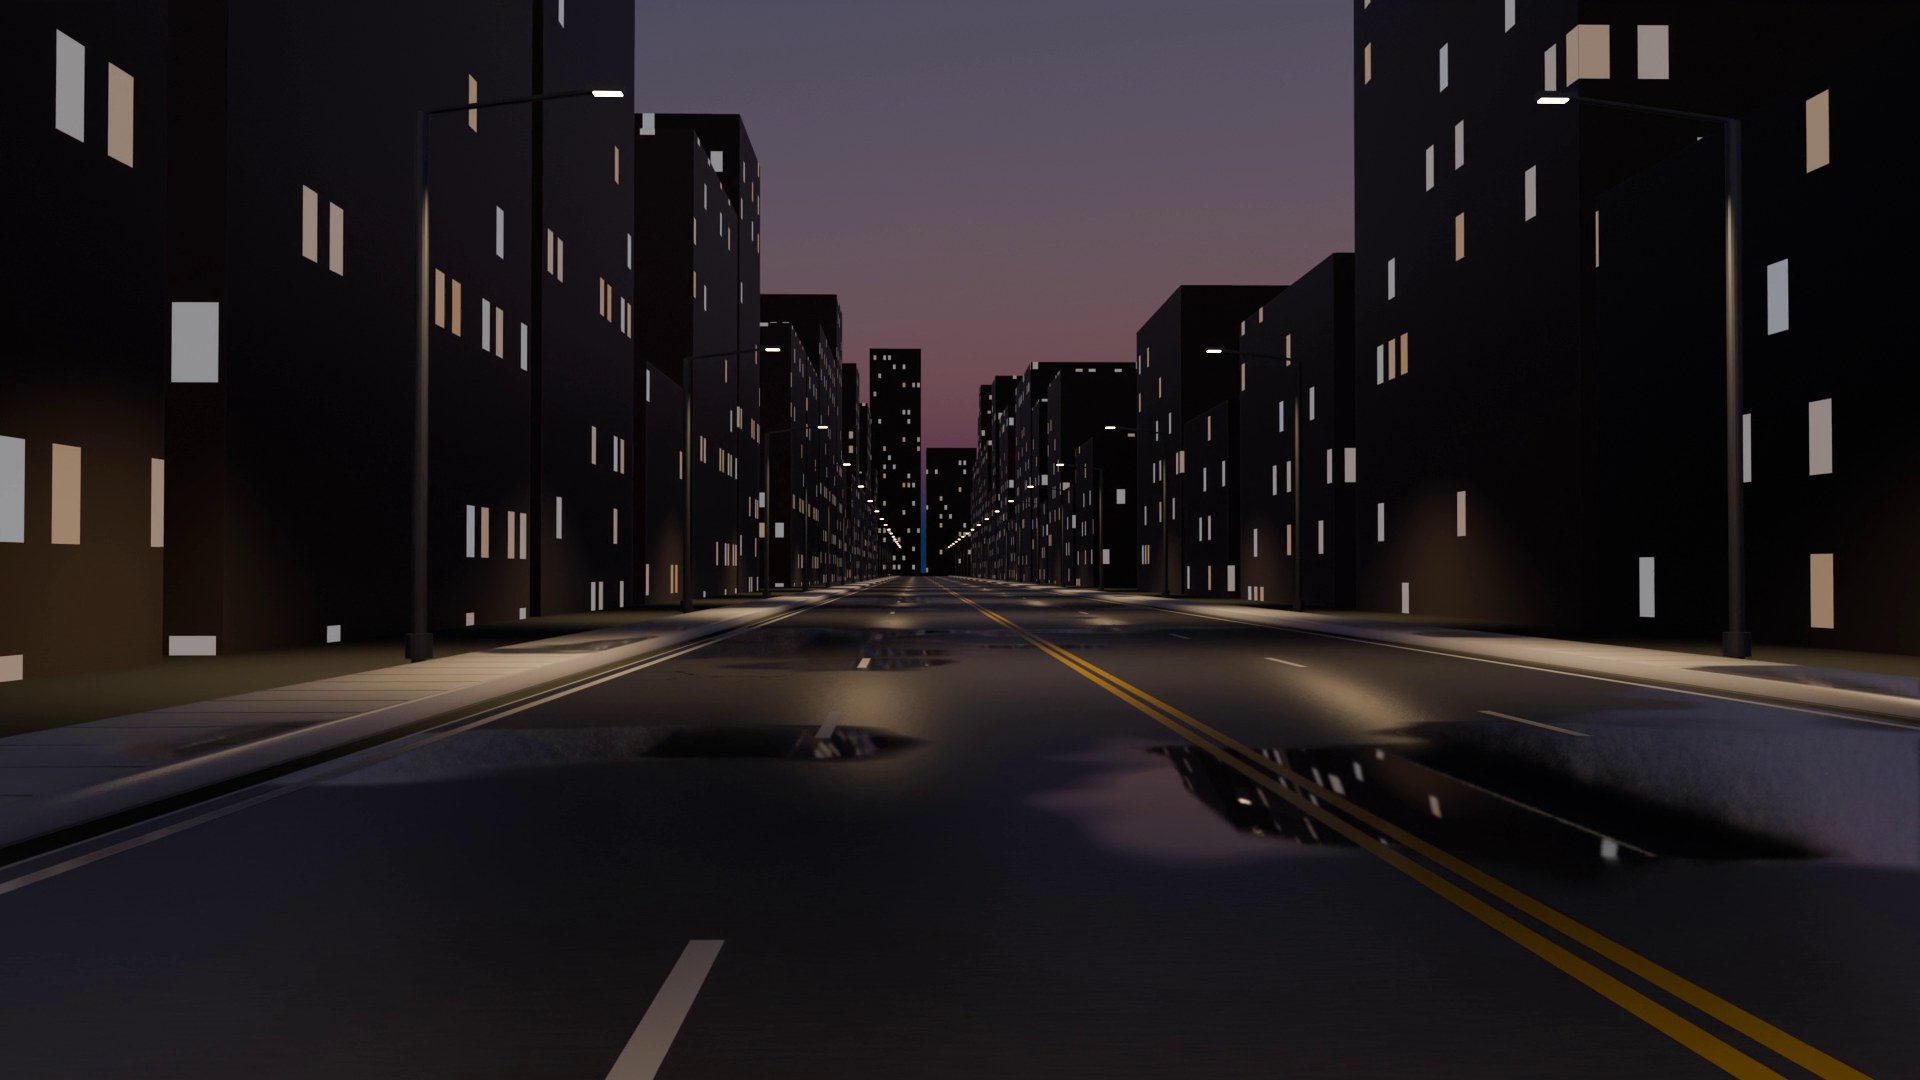
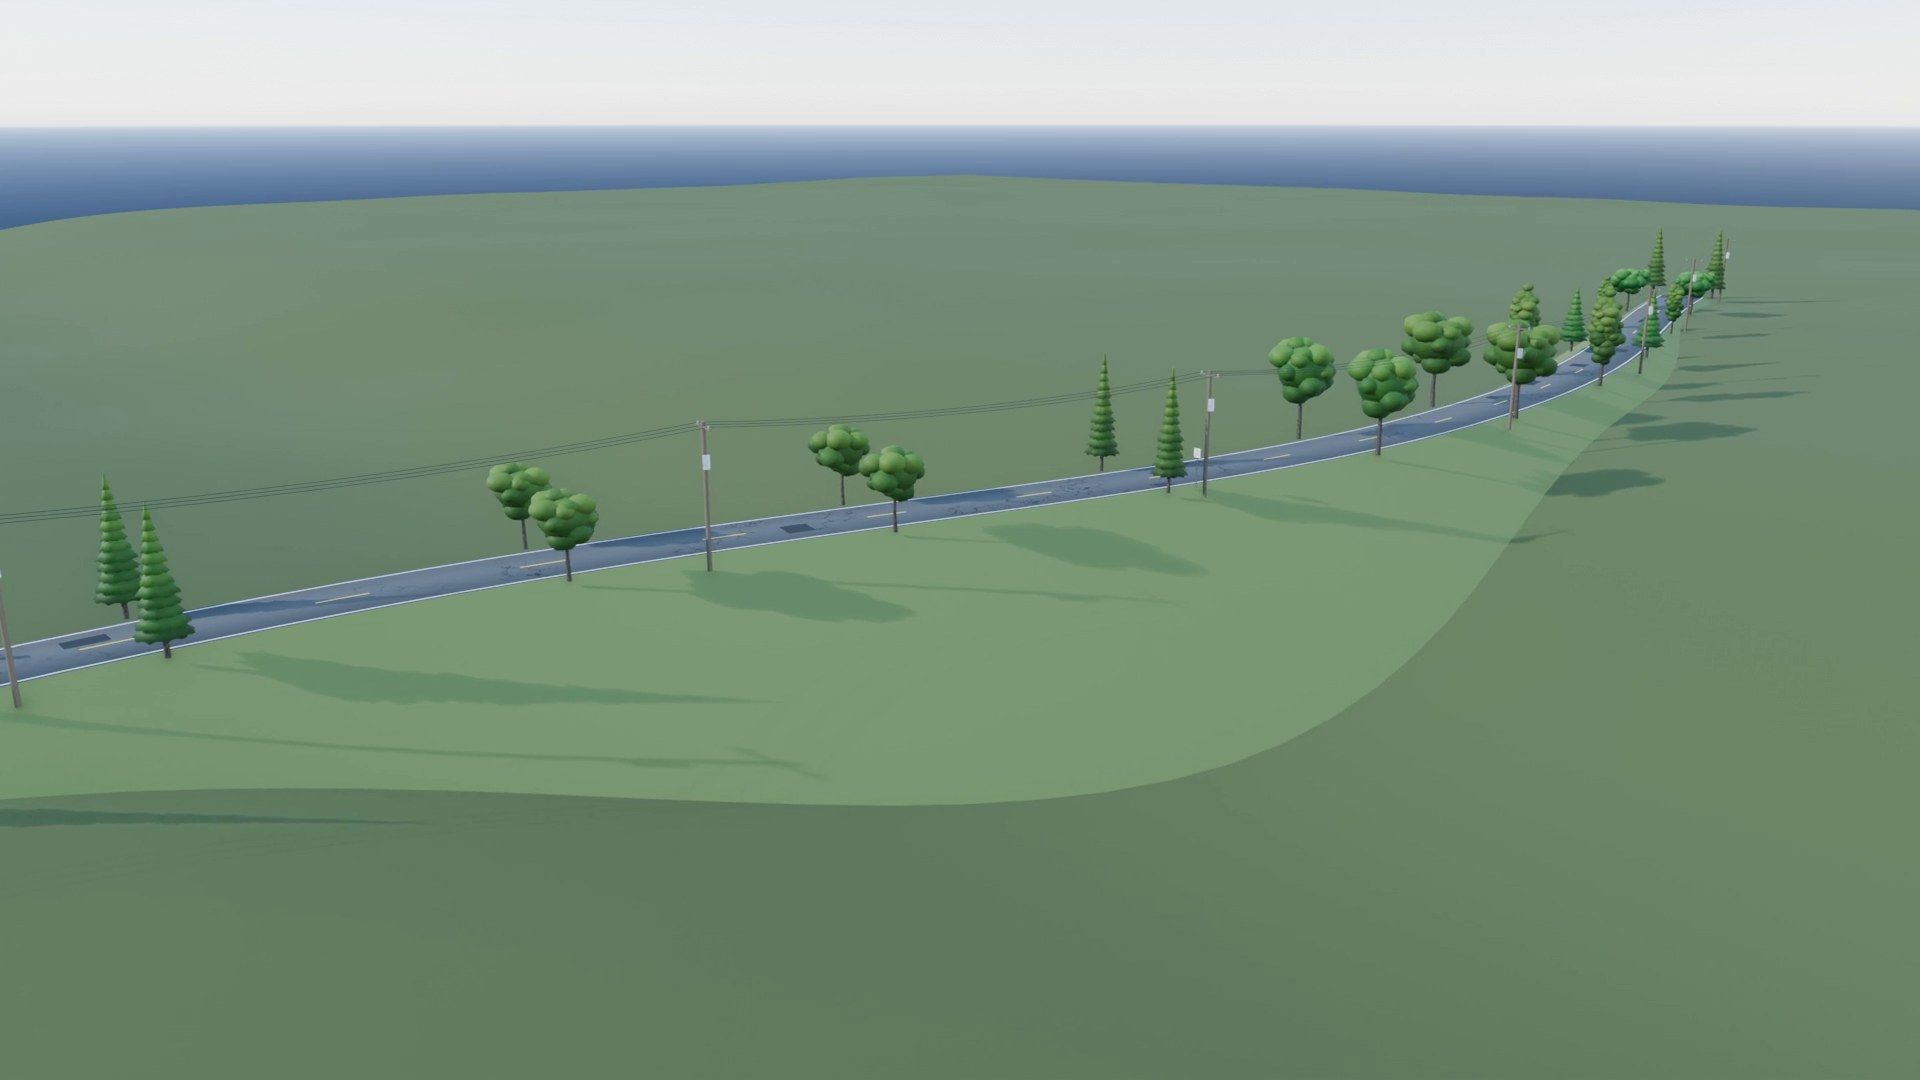
Draw one curve, get a whole street: kerbs, sidewalks, markings, signs, trees, street lights, power lines, junctions and bridges, all live and editable.
- Version 1.6.0
- Blender 4.2 and newer (tested on 5.2 LTS)
- Windows, macOS, Linux
- 12 interface languages
01What Road Builder does
Road Builder turns an ordinary Blender curve into a procedural road. A geometry nodes modifier builds the deck, kerbs, sidewalks, markings and street furniture along the curve, so everything follows the curve live: drag a control point and the whole street moves with it. Nothing is baked until you choose to bake it.
A road is built from layers you switch on and off:
- The road itself: deck width and thickness, lanes, banking and elevation.
- The cross-section: kerbs, sidewalks, drain gutters, guardrails, embankment and cut slopes.
- Markings: centre and edge lines, stop lines, crosswalks and turn arrows, in US or UK / Europe style.
- Street furniture: traffic signs, bollards, trees, street lights, utility poles and power lines, traffic signals.
- Structure: bridge piers and girders down to the ground.
- Surface: procedural materials or bundled Poly Haven textures, wear, cracks, patches and wetness.
Roads can be joined with T-junctions, crossroads and roundabouts, which rebuild themselves when you edit their roads. When the street is finished you can bake it to plain meshes, or export it for a game engine with baked textures and lightmap UVs.
02Installing
- Download
road_builder-1.6.0.zipfrom your order. Do not unzip it. - In Blender, open Edit › Preferences › Get Extensions.
- Click the ⌄ menu at the top right and choose Install from Disk…, then pick the zip. Road Builder is enabled straight away.
- In the 3D Viewport, press N to open the sidebar and click the Road Builder tab.
You can also drag the zip file onto the Blender window. The textures are bundled, so there is nothing else to download.
Install the new zip the same way; it replaces the old version. Scenes made with an earlier version update their roads when you open them.
03Quick start: your first street
- In the Design tab, click Add Road. A city street appears at the 3D cursor: asphalt, kerbs, sidewalks, markings and crosswalks.
- Press Tab for Edit Mode, select the end point and move it with G. The street follows live.
- With the end point still selected, press E and drag to extend the road, or click Gentle Left (45°) under Quick Curve Presets for a smooth bend.
- Lift a point with G Z to make a hill, then click Smooth Slope in the Curves tab to even the grade.
- Open the Additives tab and switch on what you need: Trees & Vegetation, Street Lights, Traffic Signs…
- Switch the viewport to Material Preview or Rendered to see the surface textures, wear and wetness.
Pick another preset under Road Presets (for example Modern Highway or Dirt Road): the selected road takes its widths, lanes, furniture and materials, and keeps its curve.
04The panel
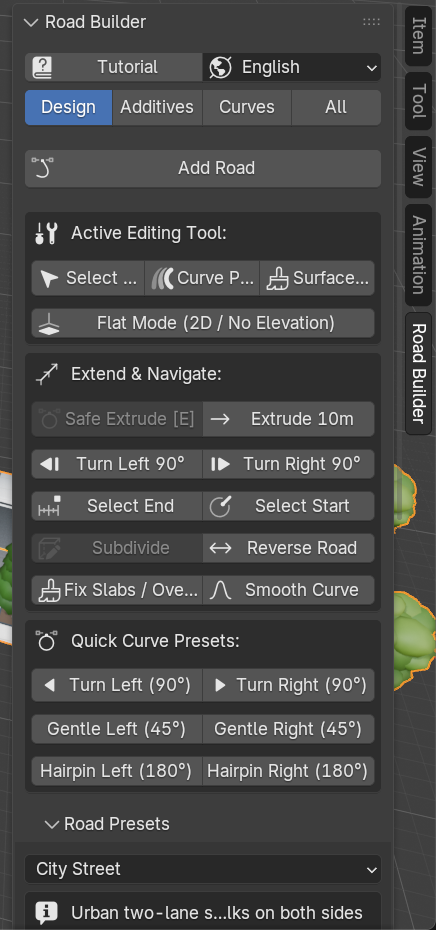
Everything lives in the Road Builder tab of the sidebar. At the top:
- Tutorial opens this guide in your browser.
- The language menu switches the panel between 12 languages (see Languages).
- Four tabs group the tools:
| Tab | What it holds |
|---|---|
| Design | Add Road, the editing tools, Extend & Navigate, Quick Curve Presets, Road Presets, Surface Materials, Road Geometry and Utilities & Bake. |
| Additives | Quick toggles and one panel per additive: sidewalks, curbs, pillars, guardrails, street lights, utility poles, markings, signals, signs, bollards, trees, gutters, slopes, zones, surface detail and sections. |
| Curves | Extend & Navigate, Quick Curve Presets, Natural Curves & Bends, Elevation & Slopes and Banking & Tilt. |
| All | Every panel at once. |
The panel shows and edits the active road (the last one you clicked). With no road selected it shows the defaults used for the next new road.
05Creating roads
There are five ways to make a road. The three editing tools sit under Active Editing Tool in the Design tab.
Add Road
Creates a new road at the 3D cursor, using the current preset. It is an ordinary curve object called Road with a RoadBuilder modifier, so every Blender curve tool works on it.
Select & Tweak
Blender's normal selection tool: click and drag control points and handles.
Curve Pen
Blender's Curve Pen tool: click to place points, drag to pull out handles. Use it to extend a road point by point.
Surface Draw
Draw roads freehand. Drag across your terrain (or the ground plane in Flat Mode): each stroke becomes a new road, fitted to a few smooth points without hooks or folds at the ends. Right-click, Enter or Esc when you are done. Middle mouse and the wheel still navigate while drawing.
Convert Selected to Road
Select any curve that is not a road yet and click Convert Selected to Road (it appears under Add Road). The curve gets the road modifier and the current preset.
Separate Roads and Smooth Drawn Curve
If a road holds several separate curves (for example after drawing extra strokes into it with Blender's own tools), the panel shows a warning with Separate Roads: it splits them into one road per curve, all with the same settings. Smooth Curve refits a hand-drawn road to a few clean points, the same way Surface Draw fits its strokes.
06Road presets
A preset sets the widths, lanes, cross-section, furniture and materials of a road. Choosing one applies it to the active road; the curve is not touched.
| Preset | What you get |
|---|---|
| Modern Highway | Multi-lane divided expressway with steel guardrails and wide paved shoulders. |
| City Street | Urban two-lane street with concrete curbs and paved sidewalks on both sides. |
| Country Two-Lane | Rural road with centre line markings and soft gravel / dirt shoulders. |
| Dirt / Mountain Trail | Natural unpaved mountain or forest track with rough sloping shoulders. |
| Dirt Road | Unpaved two-way country road of compacted dirt and fine gravel. |
| Elevated Bridge / Viaduct | High multi-lane roadway with barriers, sidewalks and support pillars. |
07Extend & navigate
The Extend & Navigate box (Design and Curves tabs) grows and tidies a road.
| Button | What it does |
|---|---|
| Safe Extrude E in Edit Mode | Extrude the selected end point and drag the new segment. The handles are kept in shape, and cancelling with right-click or Esc leaves no stacked points behind. |
| Extrude 10m | Add a 10 m segment straight ahead along the road, no dragging. |
| Turn Left 90° / Turn Right 90° | Add a quarter-circle turn at the selected end. |
| Select End / Select Start | Select the last or first point of the road, ready to extend. |
| Subdivide | Insert a point between the selected points. |
| Reverse Road | Swap the start and end of the road (left and right swap too). |
| Fix Slabs / Overlaps | Remove stacked duplicate points (for example from a cancelled extrude) and normalise the handles, which removes stray slabs and seams. |
| Smooth Curve | Refit the road to a few smooth points. |
08Curves & bends
Quick Curve Presets
Select the end point of a road in Edit Mode and click a preset to add a true circular bend: Turn Left / Right (90°), Gentle Left / Right (45°) or Hairpin Left / Right (180°). The bend uses the radius set under Natural Curves & Bends.
With Auto-Bank on Curve on, the bend is banked for the design speed (see Banking), and the bank rolls in and back out gradually, so the road is level again where the bend ends.
Natural Curves & Bends (Curves tab)
- Custom Curve / Bend: pick Left or Right, set the Angle, and click Apply Natural Curve. With two points selected it bends the road between them; with one end point selected it extends the road with a new bend.
- Turn Radius: how wide the bend is. Larger is gentler.
- Auto-Bank Tilt: bank the new bend for the design speed (off in Flat Mode).
Corner Rounding & Cleanup
- Fillet Corner rounds a sharp corner point into a circular arc of radius Fillet R.
- Fix / Normalize Handles aligns the handles so the road has no pinches or kinks.
- Fix Slabs & Overlaps is the same clean-up as in Extend & Navigate.
09Elevation & slopes
Raise or lower any control point and the road climbs with it. The Curves tab has tools to keep the grade drivable:
| Tool | What it does |
|---|---|
| Smooth Slope (Constant Grade) | Gives the selected points one even gradient from the first to the last, like an engineered road. |
| Flatten Bumps between selected | Select a start and an end point: removes small bumps, dips and ripples between them and keeps the overall climb. Method: Linear Gradient (a straight grade), Smooth S-Curve (eases in and out), or Relax Bumps (only softens the ripples). In the redo panel you can also set the strength, iterations and handle alignment. |
| Level to Start / Level Ground (Z=0) | Put every selected point at the height of the first one, or on the ground. In the redo panel you can also level to the average height. |
| Height Offset | Nudge the selected points up or down by 1 m or 0.5 m. |
| Flat Mode (2D / No Elevation) | Locks drawing, extruding and editing to a flat plane: roads stay at one height and are never banked. Ideal for city grids and race-track layouts. |
Raise the middle of a road to make an overpass, then switch on Bridge Support Pillars to put piers under it (see Bridges).
10Banking & tilt
Real roads tilt into their curves so that cars can take them at speed. Road Builder works the angle out from physics: tan(θ) = v² / (g · R), where v is the design speed and R the radius of the curve at each point.
- Speed (km/h): the design speed. Faster means more bank.
- Max Tilt (°): the bank never goes past this angle.
- Auto-Bank Curve: banks the whole road (or the selected points in Edit Mode) from its curvature.
- Smooth Tilt: evens out the transitions between banked and level stretches.
- Reset (0°): makes the road level again.
To bank a point by hand, select it in Edit Mode and press Ctrl T (Blender's tilt tool). In Flat Mode, banking is switched off.
11Cross-section: width, kerbs, sidewalks
Road Geometry & Dimensions (Design tab)
- Width: the carriageway, kerb to kerb. With Width From Lanes on (Road Markings), it follows the lane count instead.
- Thickness: the real depth of the road slab, with side skirts and a base, so raised roads look solid.
- Quick toggles for Concrete Curbs, Left / Right Sidewalk, Left / Right Guardrail and Bridge Support Pillars. More Additive Settings jumps to the Additives tab.
Curbs (Edge Stones)
- Height and Width of the kerb stone.
- Chamfer Bevel Ratio: 0 is a square vertical face, 1 a full ramp.
Sidewalk (Pedestrian Slab)
- Left Sidewalk / Right Sidewalk: switch each side on or off. Turn both off (and the kerbs) for a footpath or a country lane.
- Dimensions: Width, Height above the road, and Outer Slab Depth (how far the outer face drops).
- Edge Profile: Beveled Lip, Square Barrier or Flush Plaza (level with the road), and the chamfer of the edge.
- Expansion joints: Show Line Ridges adds grooves across the slabs, with their Joint Spacing and Groove Width.
12Guardrails
Switch on Left Guardrail and / or Right Guardrail, then set:
- Barrier Type: W-Beam (Armco), Concrete Jersey Barrier, Thrie-Beam (Heavy Duty), Pipe Railing, Handrail or Cable Barrier.
- Placement: Auto, on the road deck edge, or on the outer edge of the sidewalk. Offset moves it out (+) or in (−).
- Height of the barrier.
- Support Posts (not for Jersey barriers): post shape (Steel I-Beam, Square Tube, Wood, Round Pipe) and spacing.
- Reflector Delineators: reflective markers along the barrier.
13Road markings
Switch on Road Markings in the Additives tab.
Layout
- Style: US (yellow centre lines) or UK / Europe (white). Traffic signs follow the same style.
- Lanes and lane Width (3.5 to 3.7 m is typical). Width From Lanes keeps the road as wide as its lanes, so adding a lane widens the road; the panel shows the resulting road width.
- Traffic: two-way or one-way. Driving: right-hand or left-hand traffic (also decides which side signs stand on).
Lines
- Centre Line: Auto, Dashed, Solid, Double Solid or None.
- Edge Lines with their Inset from the kerb, the Line Width, and the Dash and Gap lengths of dashed lines.
Stop lines, crosswalks and arrows
- Stop Lines At Start and / or At End of the road, with their width and Setback from the road end.
- Crosswalks: None, At Ends, At Interval, or Ends + Interval. Style: Zebra, Continental or Transverse Lines, with depth, bar width and interval.
- Turn Arrows: layout (Auto, Straight, Left, Right, Straight + Left, Straight + Right, All Directions), distance from the stop line and length.
14Signs, bollards, trees & gutters
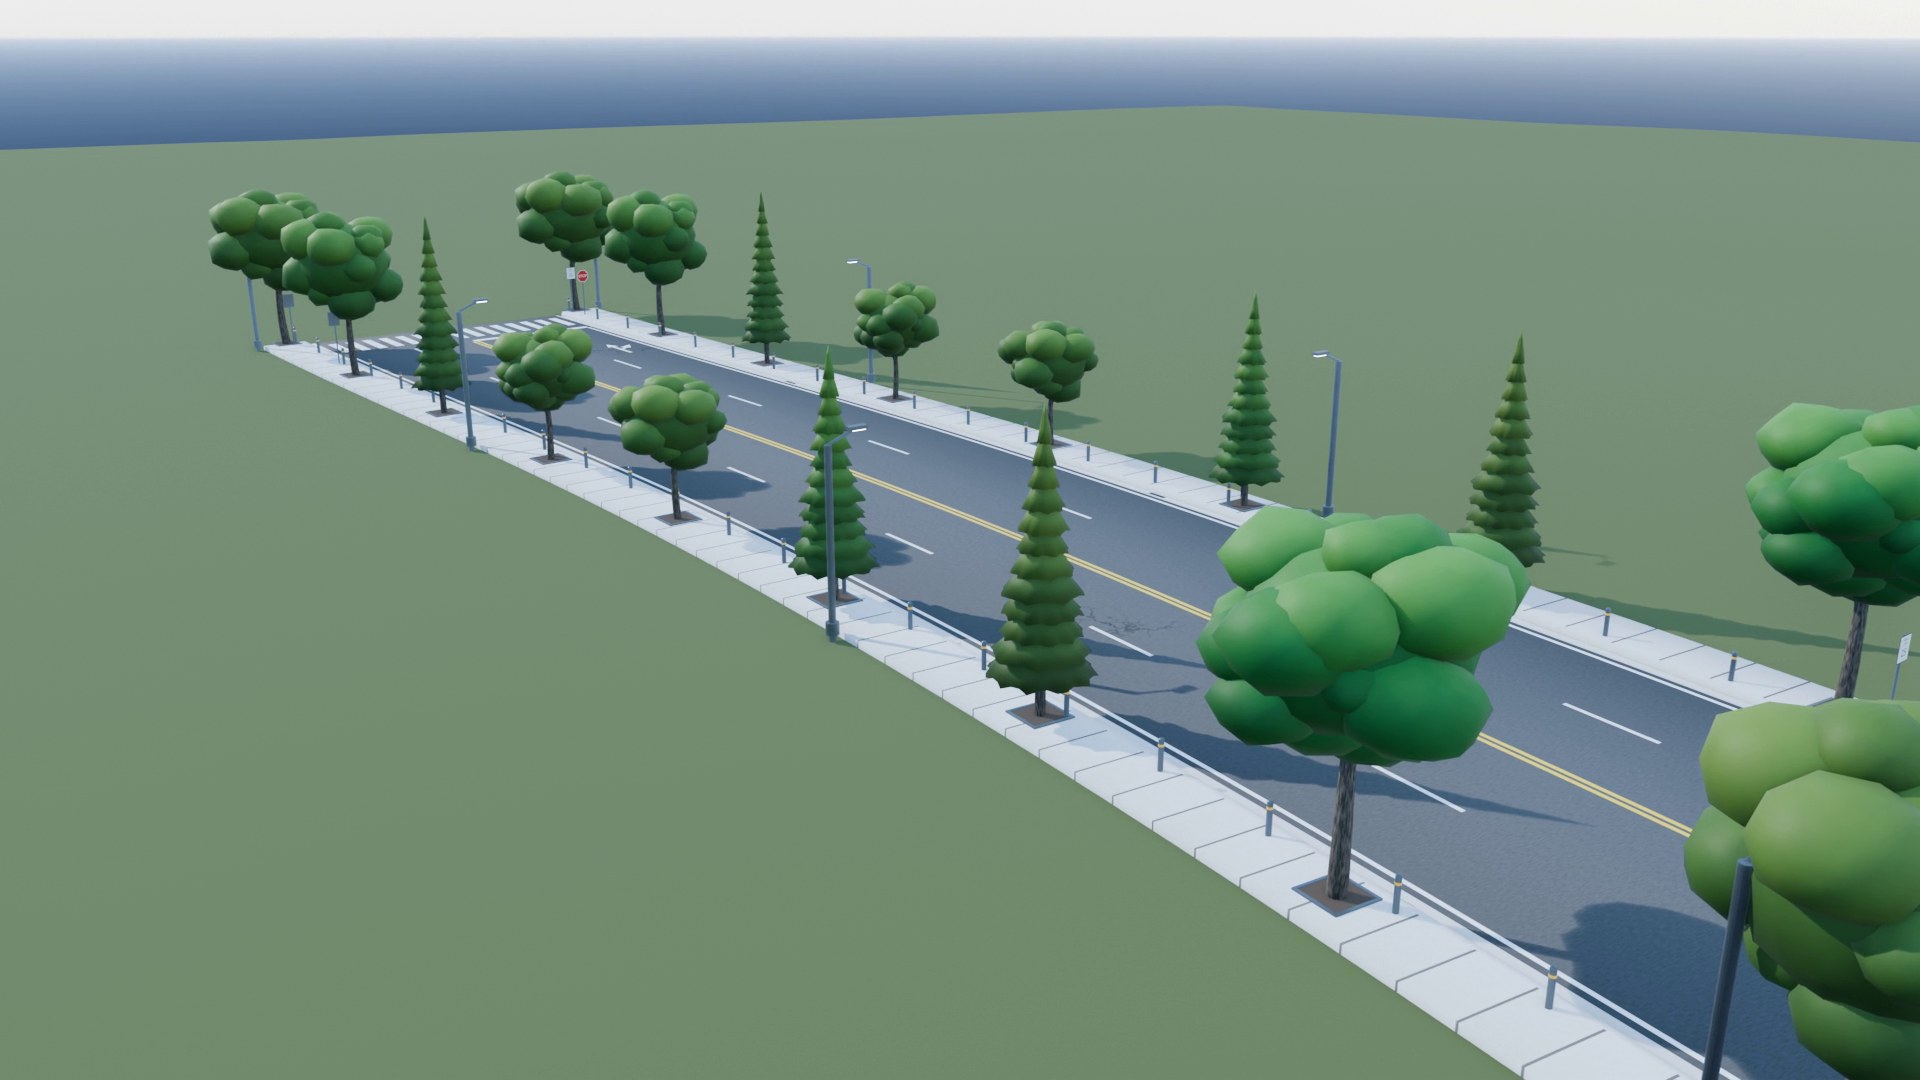
Traffic Signs
- End Sign: Stop, Give Way or Yield at the end of the road, at a distance From End. Also At Start adds one for traffic arriving at the start (two-way roads).
- Speed Limit Signs: the Limit and the Interval between signs.
- Kerb Offset and Mount Height of the sign plates.
Bollards
Steel or Concrete, on the right, left or both sides, with spacing, height and distance from the kerb.
Trees & Vegetation
- Placement: Sidewalk Pits (in soil pits near the kerb) or Roadside Verge (beyond the road or sidewalk).
- Side, Spacing, Offset and Jitter (random shift along the road).
- Soil Pits: the soil bed with its edging around each sidewalk tree.
- Built-in Style: Broadleaf, Conifer, Columnar or Mixed, with Scale, Scale Random and Seed.
- Your own trees: put tree objects in a collection and pick it under Collection. Road Builder places them at random instead of the built-in trees.
Kerb Drain Gutter
A concrete channel along the kerb (roads with curbs only), with Width, Depth and Drain Grates at a set spacing. The lanes keep their width; the road grows to make room.
15Street lights
Switch on Generate Street Lights, then set:
- Fixture Style: Cobra Head, Dual Mast, Urban Decorative or High Mast Tower.
- Placement: right side, left side, both sides, centre or median. On both sides, Staggered (Zigzag) offsets one side by half a spacing.
- Spacing, Height and Arm Overhang (how far the luminaire reaches over the road).
- Color Temp: LED Cool White (4500 K) or High-Pressure Sodium (2200 K), and the Intensity of the glowing luminaire.
The luminaires glow (an emissive material), which looks right in the frame. In EEVEE, emissive surfaces light their surroundings only a little: for strong pools of light on the road at night, add a point or spot light under each lamp head.
16Utility poles & power lines
- Generate Utility Poles, then the Pole Style (Rural Timber, Urban Concrete or Steel Pylon) and the Roadside (right or left verge).
- Spacing, Height and Roadside Offset from the outer edge of the road or sidewalk.
- Distribution Transformer: transformer drums and service brackets on the poles.
- Catenary Power Cables: continuous wires between the insulators. Conductors: a single line, three-phase distribution, or three-phase plus a ground wire on top. Catenary Sag sets how far they droop mid-span.
17Bridges & piers
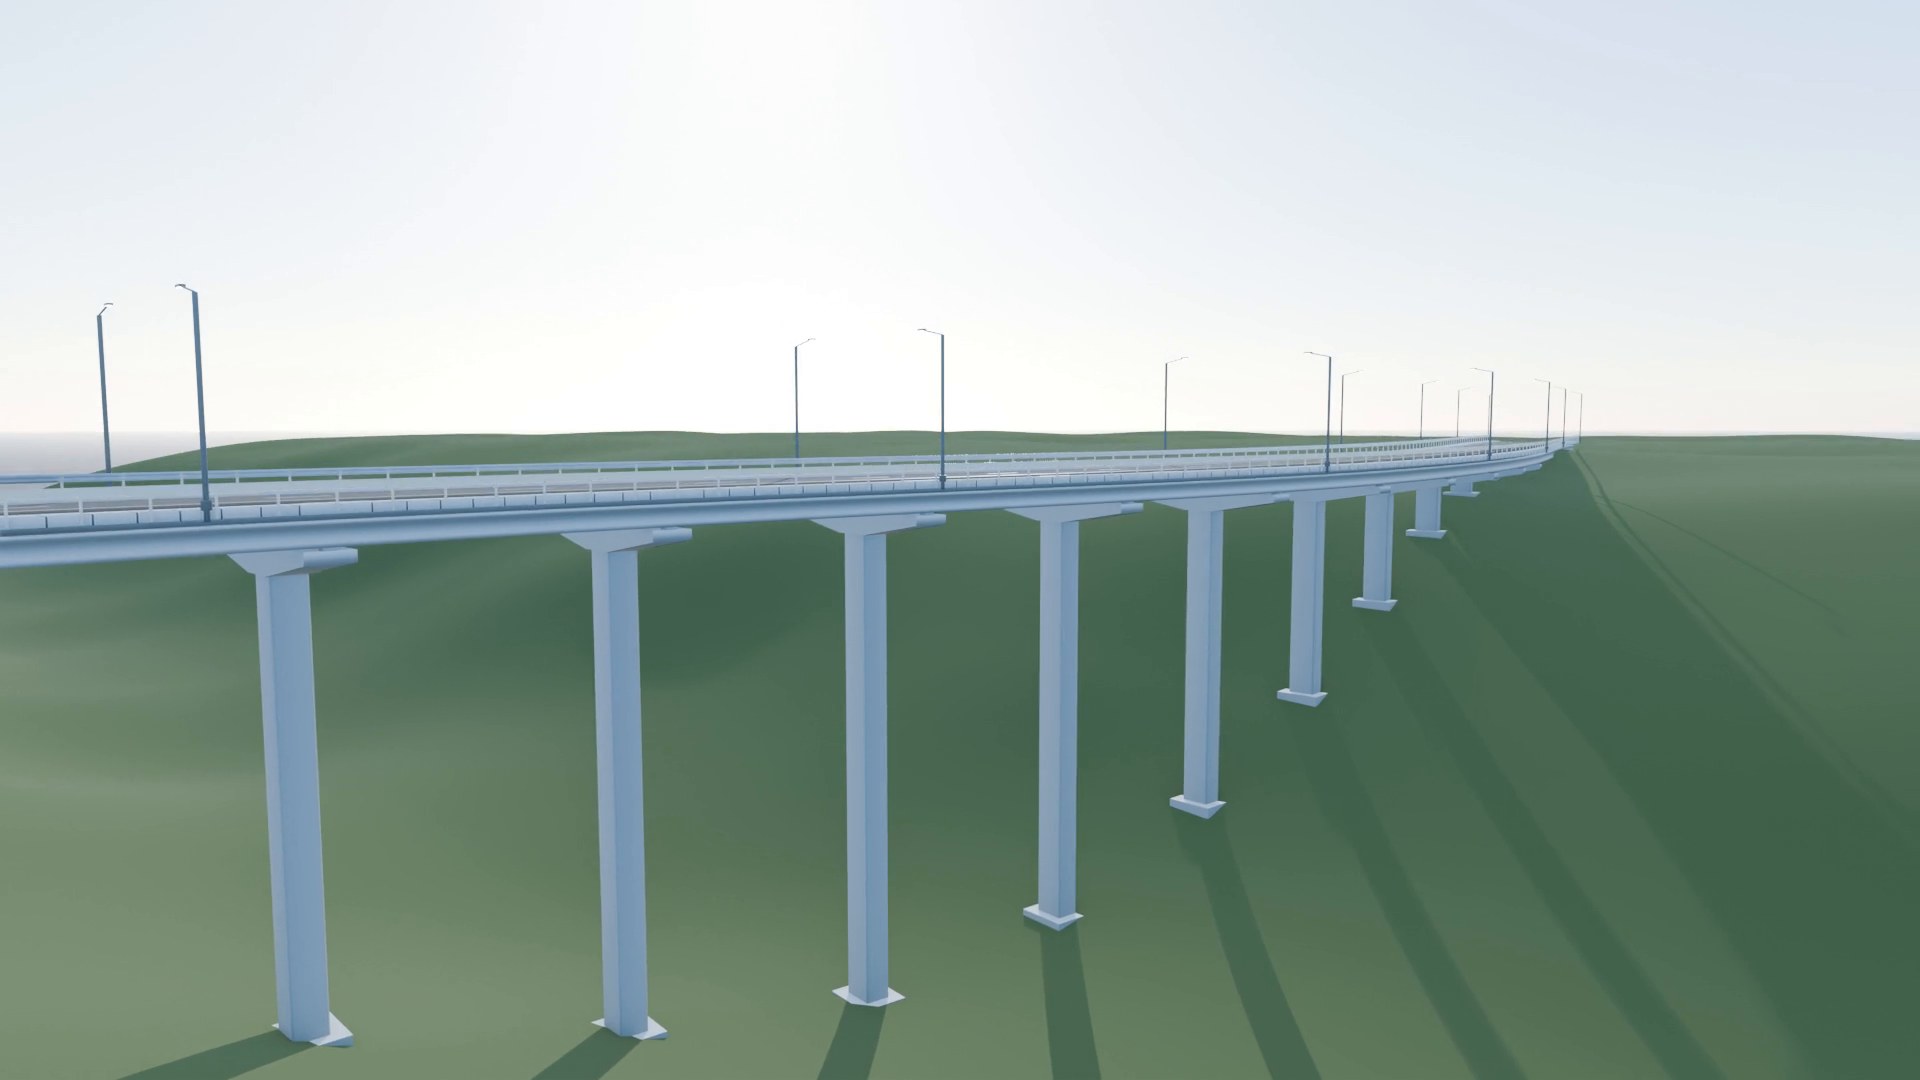
Lift a road above the ground and switch on Generate Support Pillars (Additives › Support Pillars). Piers are placed wherever the deck is high enough above the ground.
- Style: Hammerhead (a column with a wide cap), Flared, or Simple Column (round or square).
- Spacing, column Width and thickness, and the Cap Height of hammerheads.
- Footings: a concrete pad under each column. Deck Girders: girders (Hammerhead) or a box girder (Flared) under the whole deck, with their depth.
- Top Clearance Offset fine-tunes where the column meets the deck.
- Ground: piers stand on the Terrain object if you set one (shared with the embankment slopes), otherwise on the flat Ground Height. Min Clearance: no pier where the deck is closer to the ground than this.
- Pillar Material: procedural concrete or one of the concrete textures.
The Elevated Bridge / Viaduct preset sets all of this up at once.
18Terrain: drawing, snapping, slopes
Draw on the terrain
Use Surface Draw and drag across any mesh. The road follows the ground, is lifted wherever the ground would cut through it (across a hillside, or over a crest), and gets embankment / cut slopes down to the mesh you drew on.
Snap an existing road
Under Utilities & Bake › Terrain Projection, pick the terrain mesh and click Snap Road to Terrain: every control point of the active road drops onto the ground.
Embankment / Cut Slopes
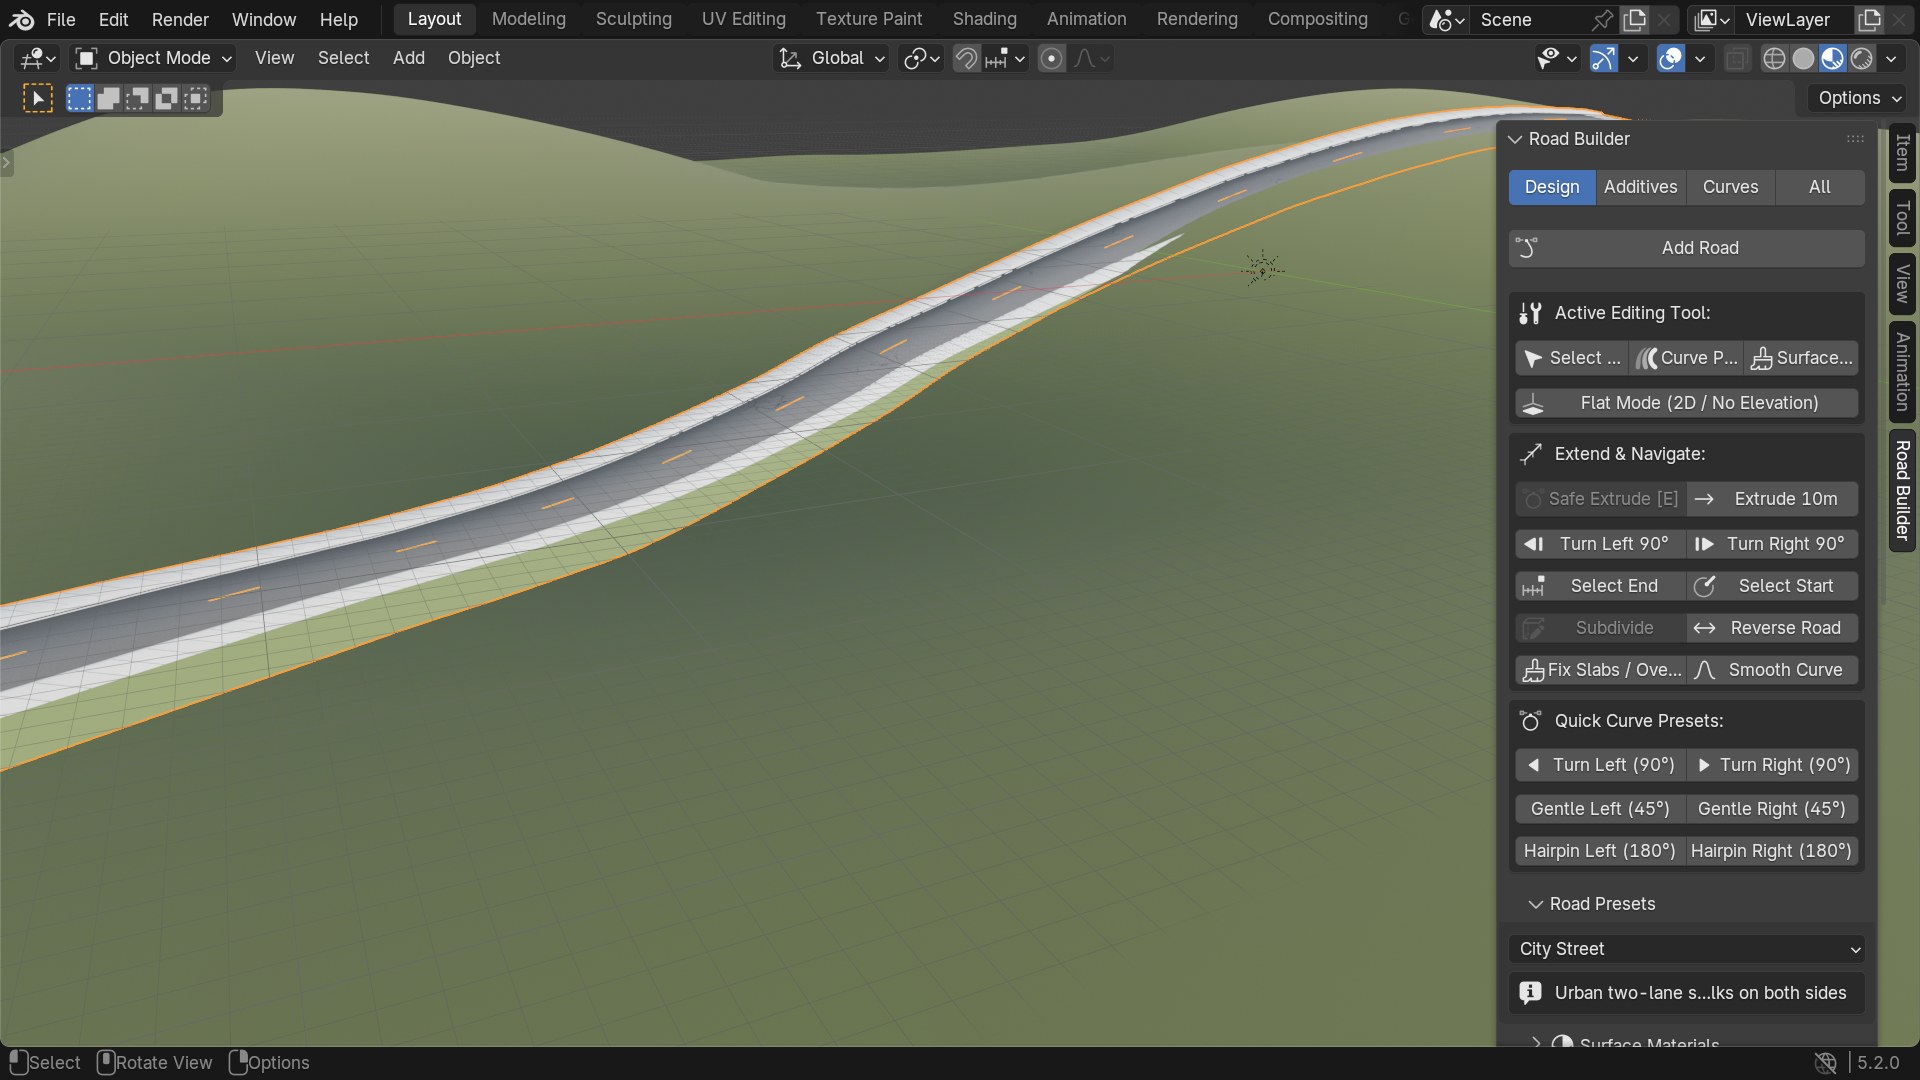
- Switch on Embankment / Cut Slopes and choose the Side.
- Fill 1 : how many metres the slope runs out per metre of drop where the road is above the ground. Cut 1 : the same where the road is below it.
- Terrain: the mesh the slopes run to. Without one they meet the flat Ground Height.
- Slope Material: the preset's own, grass or concrete, with rotation and scale.
19Surface materials
Open Surface Materials in the Design tab. There is a choice for each part of the road: Road, Sidewalk, Kerb, Embankment / Cut Slopes and Bridge Pillars & Girders. Preset Default keeps the preset's own material; the rest are 32 bundled Poly Haven textures (CC0) at real-world scale:
Roads
- Asphalt 01, 02, 04, 06, Track, Pit Lane
- Worn Asphalt, Road Damaged
- Gravel Road, Tarred Gravel, Pebble Ground
- Red Laterite Soil, Rocky Trail, Dirt Road
- Cobblestone Large, 08, 001
Sidewalks, kerbs, slopes & pillars
- Concrete Pavement, Square and Patterned Pavers
- Hexagonal Paving, Herringbone, Brick Pavement
- Brushed, Granular and plain Concrete, Concrete Floor
- Grass (slopes)
- Board-Formed, Poured Layers, Smooth Concrete, Ribbed Panels (pillars)
When a texture is chosen, Rotation turns it and Scale makes it larger (above 1) or smaller (below 1). UV Length Tiling (Utilities & Bake) sets how often the textures repeat along the road.
20Wear, cracks, patches & wet roads
In Road Surface Detail (Additives tab), per road:
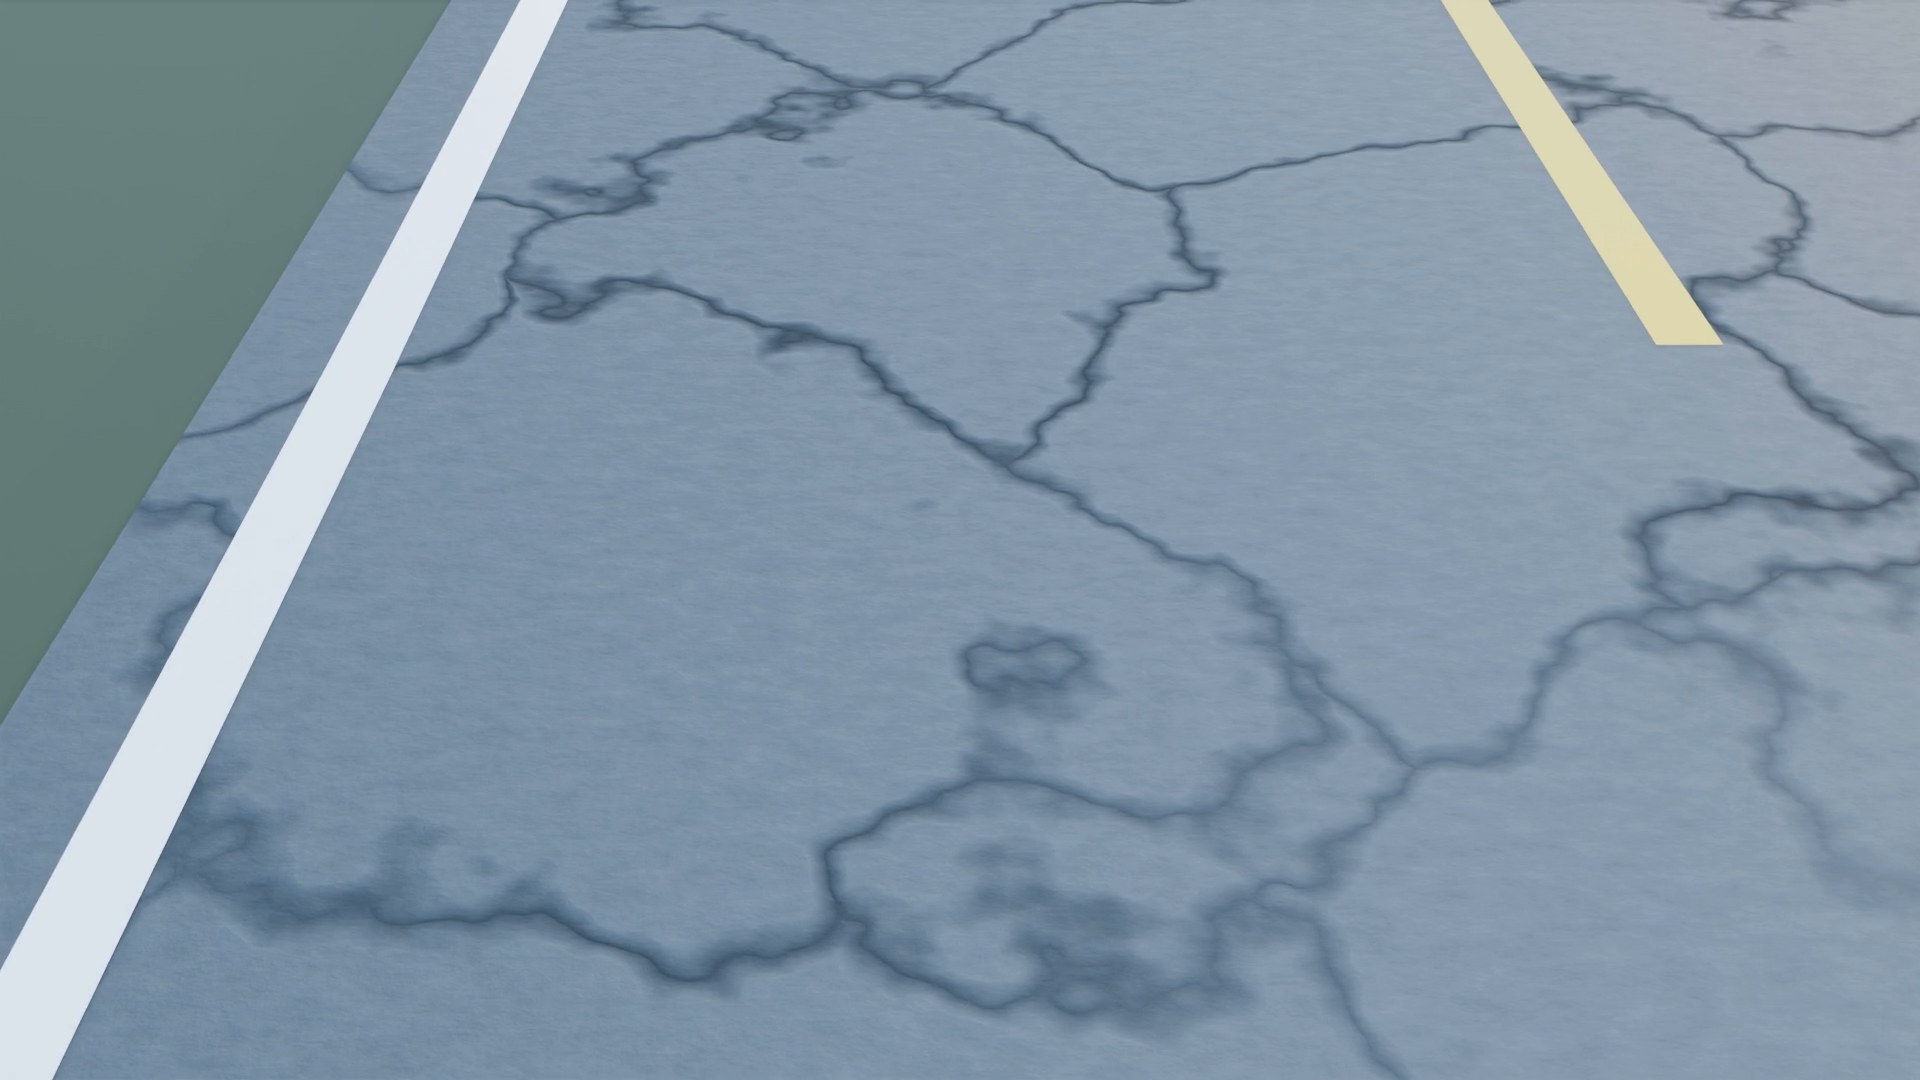
- Wear & Cracks: worn, rougher asphalt and a network of cracks. Crack Size sets how large the crack cells are.
- Wetness: rain. Surfaces get darker and glossier, and puddles form and mirror the sky and lights.
- Patch Repairs: patches of newer asphalt, with average spacing, size and seed.
Wear and wetness are shader effects, so they do not show in Solid view. Like any setting, they can be keyframed: animate Wetness from 0 to 1 for a road drying out or a storm rolling in.
21Junctions & traffic signals
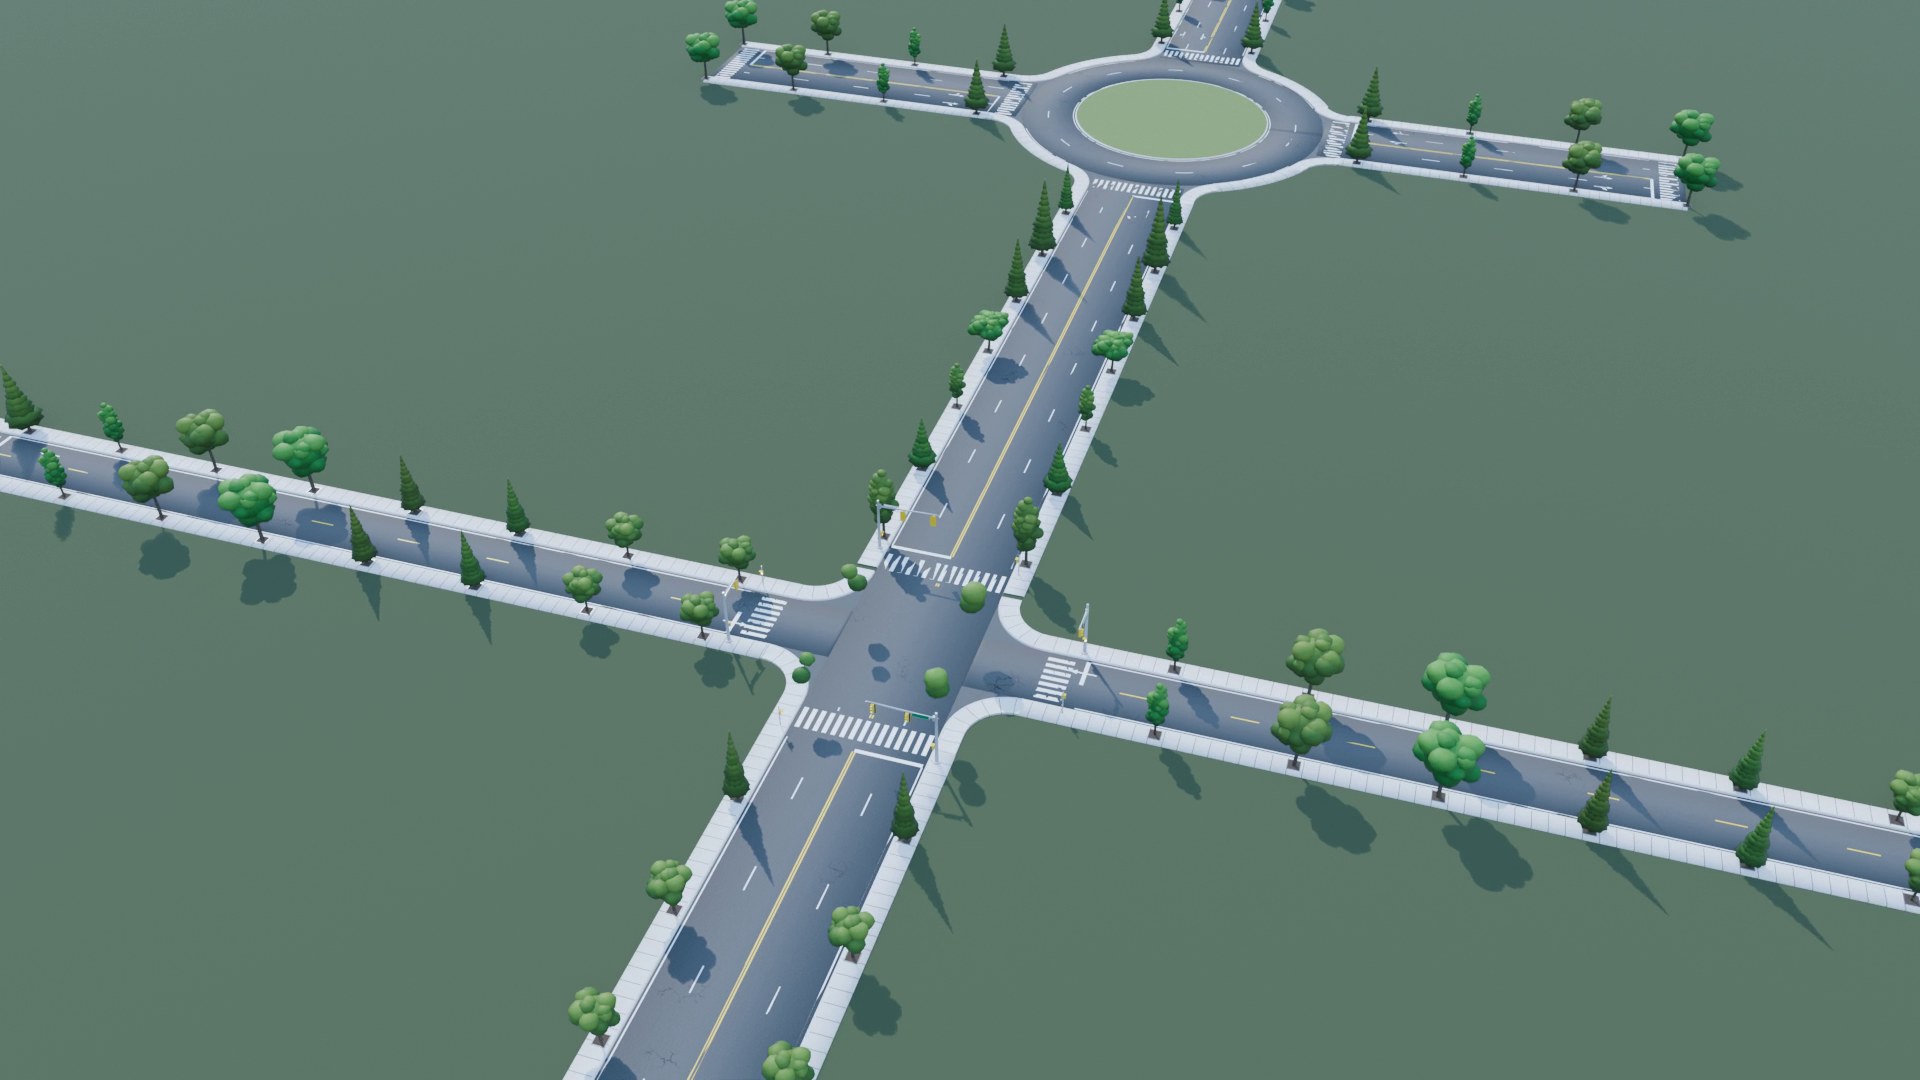
The junction tools are at the top of Zones: Junctions & Bus Bays in the Additives tab.
T-junction
- Draw the branch road so its end reaches the side of the main road.
- Click the branch road, then Shift-click the main road so it is the active object.
- Click Make T-Junction, or With Signals for a signalised junction. The kerbs, sidewalks and markings of the main road open up, kerb returns round the corners, and crosswalks are added.
Crossroads
Draw a road straight across the main road, select it, Shift-click the main road and click Make Crossroads (or With Signals). The crossing road is cut into two arms that join the main road with kerb returns on all four corners. The redo panel sets the corner radius.
Roundabout
Select a road and click Add Roundabout: a roundabout is added at its end (in Edit Mode, select its first point to use the start instead), with arm roads joined to it. With nothing selected it goes at the 3D cursor. In the redo panel: radius, ring lanes, number of arms, arm length, corner radius and driving direction (anticlockwise for right-hand traffic, clockwise for left-hand).
Junctions follow your edits
Move a road, change its lanes or widths, and its junctions rebuild by themselves: kerb returns, cleared sidewalks, crosswalks and signals. Update Junctions rebuilds them all by hand if you ever need to. Undo and redo are safe.
Traffic signals
Signalised junctions get mast arms with signal heads, stop lines and crosswalks. The Traffic Signals panel controls them:
- Signal Stations: a signal for the traffic arriving at the Road Start and / or Road End, and which Phase (A or B) they are green in. The panel shows how many junction stations the road has; the × button clears them.
- Hardware: Crosswalks, Pedestrian Signals, Street Name Signs and the Arm Height.
- Timing (all signals in the scene): Animate cycles the lights as the timeline plays, with Green, Amber and All Red times in seconds. Phase A is the main road, Phase B the side road. With Animate off, Hold picks the state to show.
22Zones & bus bays
Zones change a stretch of one road, measured in metres along it. Select a road, then in Zones: Junctions & Bus Bays:
- The + button adds a Clear Roadside zone: sidewalks, kerbs and furniture are removed on that side for the stretch (driveways, gaps, open plazas). Junctions add these zones themselves.
- The bus button adds a Bus Bay: the kerb is pushed out to make a lay-by, tapered at both ends, with an optional bus Shelter on the sidewalk. Bay Depth and Taper Length set its shape.
- In the list, set each zone's side, start and end. − removes the selected zone. A road can hold up to 8 zones.
23Additive sections
Sections limit an additive to part of a road: street lights only along the town stretch, a guardrail only over the bridge, trees only on one side of the park.
- In Edit Mode, select the two control points where the stretch starts and ends.
- In Additive Sections, choose the additive (Sidewalks, Curbs, Guardrails, Bridge Pillars, Street Lights, Utility Poles, Road Markings, Traffic Signs, Bollards, Trees, Drain Gutter, Embankment Slopes, Patch Repairs or Traffic Signals) and the side.
- Click Add Section From Selected Points.
An additive that has sections only appears inside them. A Left or Right section only limits that side. Remove a section from the list to bring the additive back along the whole road.
24Bake & export
Bake to Static Mesh
Turns the active road into plain mesh objects with their UVs and materials, for hand editing or for your own export. In the redo panel: Split (one mesh, or the road surface and the props as separate objects), Lightmap UVs, and Hide Source Road.
Export for Game Engine / Web
Select the roads, click Export for Game Engine / Web, choose a file name and set the options on the right of the file browser:
| Option | What it does |
|---|---|
| Target | Godot (glTF .glb), three.js / Web (glTF .glb with Draco compression), Unreal Engine (FBX, Z-up, metres), Unity (FBX), Generic glTF (.glb) or OBJ. |
| Split | Road + Props (road surface and lights, poles, signs, trees as separate objects) or a single mesh. |
| Lightmap UVs | Adds a second, non-overlapping UV set for baked lighting. |
| Bake Textures | Bakes the procedural materials (markings, wear, wetness) to image textures, because engines cannot run Blender shaders. Texture Size 512 to 4096 px, and Bake Samples. |
| Keep Baked Objects | Leaves the baked meshes in the scene after exporting. |
The colour textures use the first UV set and the lightmap the second, which is what Godot, Unreal and Unity expect. Baking takes a little while for long roads; start with 1024 px textures while you test.
25Pie menu & shortcuts
In Edit Mode on a road:
26Languages
The menu with the globe at the top of the panel switches Road Builder's interface, with no restart: English, Deutsch, Français, Español, Italiano, Português (Brasil), Polski, Русский, 日本語, 한국어, 简体中文 and 繁體中文.
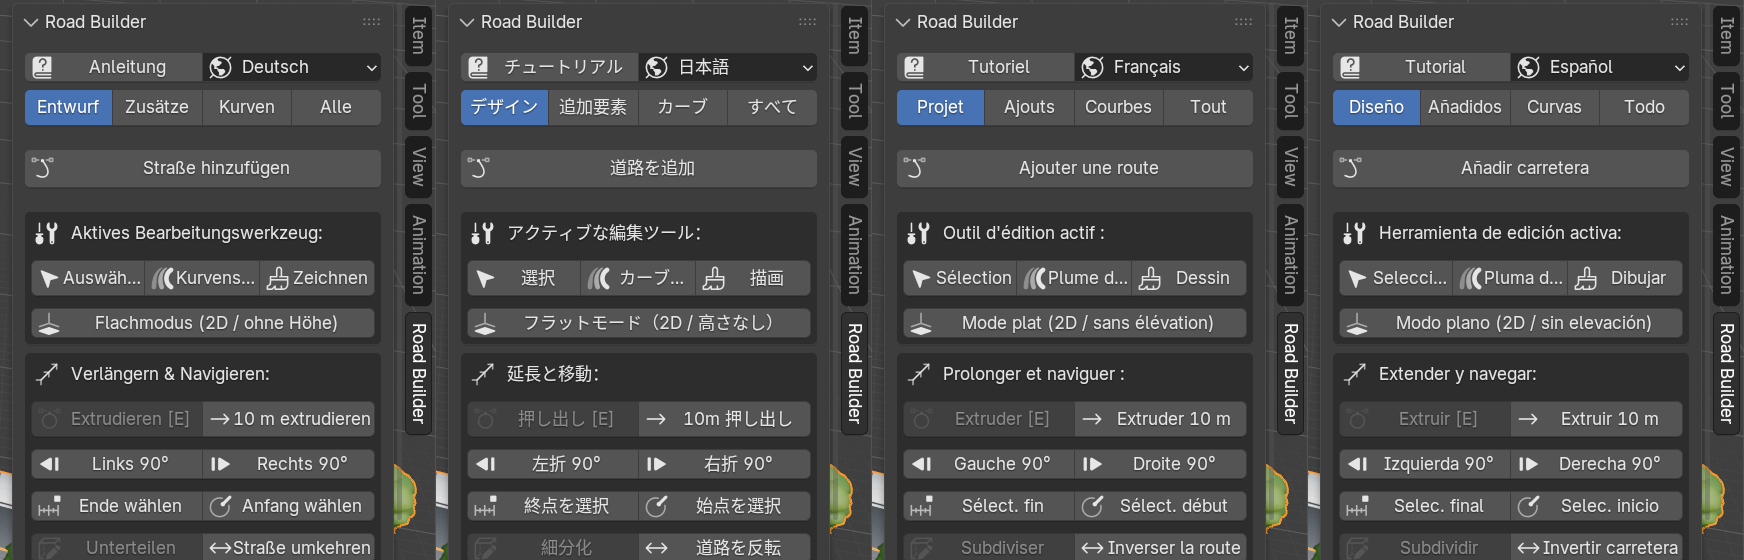
The panel's titles, labels, buttons, setting names and option buttons follow that menu. Drop-down lists, redo panels and the export dialog follow Blender's own language (Edit › Preferences › Interface › Translation): set Blender to the same language and those are translated too. Texture names stay in English, and tooltips are in English.
27Tips & troubleshooting
I can't see textures, wear or wetness
Switch the viewport to Material Preview or Rendered. Solid view shows plain colours.
A thin slab or seam appears across the road
Two control points are stacked on top of each other, usually from a cancelled extrude. Click Fix Slabs / Overlaps. Use E (Safe Extrude) instead of Blender's plain extrude to avoid it.
The road pinches or kinks at a point
The handles there are uneven. Select the points and click Fix / Normalize Handles, or round a sharp corner with Fillet Corner.
The panel edits the wrong road
Settings apply to the active road, the last one clicked. Click the road you want first.
Selecting a road selects several roads at once
They are separate curves inside one object. Click Separate Roads in the warning box at the top of the Design tab.
The junction tools say nothing happened
Select the branch or crossing road first and the main road last (so it is the active object). For a T-junction, the end of the branch must reach the main road; for a crossroads, the crossing road must cross it.
No piers appear under my bridge
Piers only go where the deck is higher than Min Clearance above the ground. Check the Terrain object or the Ground Height in the Support Pillars panel.
Gutters do nothing
Drain gutters run along the kerb, so the road needs curbs (Additives › Curbs).
A keyframed setting doesn't change in my rendered animation
Keyed road settings update when the frame changes in the viewport. If a full animation render shows them stuck, render the frames as an image sequence one frame at a time (for example from a script that sets each frame and renders a still), then encode the video.
The first road takes a while in a new Blender version
Road Builder ships its road graph prebuilt for Blender 5.2. In other versions it builds the graph once (about half a minute) and keeps it, so later roads appear instantly.